Introduction
In our previous article, ‘Advanced Features of Bouquet’, we demonstrated some of the more advanced image editing features. Using the Primary Effect Filters and Image Alpha slider, there are nearly unlimited combinations of personalized photo mosaics just a tap away. Re-opening the app after closing saves your progress, but what happens when you want to move on to another project?
Here we’ll be covering how to save a mosaic to one of Bouquet’s three memory slots, remove the previously selected piece images, and select a new parent image. We’ll also show how to save a thumbnail version and high resolution version of your mosaic to share with friend, family, or post on social media. Let’s get into it!
Previous Articles
Introducing Bouquet: Creating Stunning Photo Mosaics
Bouquet: Photo Mosaic Tutorial
Where to Download
The app is free to download. Use the links below.
App Store:https://apps.apple.com/app/id1494245634
Official Website:https://bouquet.sola.inc/
Starting over from an Existing Mosaic
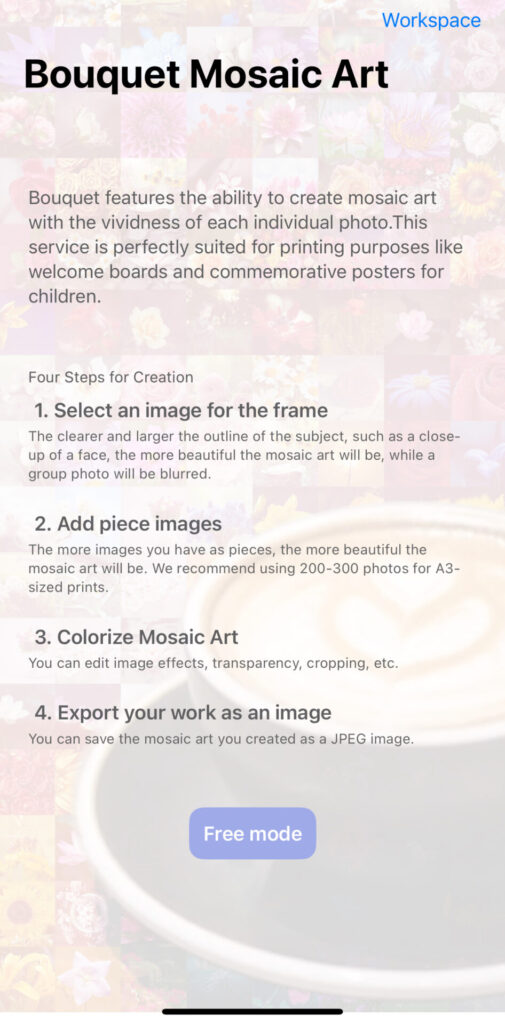
Upon first opening the Bouquet app, you’ll always be greeted by the left-hand screen capture. If you’ve been following along with our Bouquet guides, then tapping or clicking ‘Free mode’ will start a new mosaic if you’ve never created one or take you back to your current project—complete with the parent image and selected pieces.
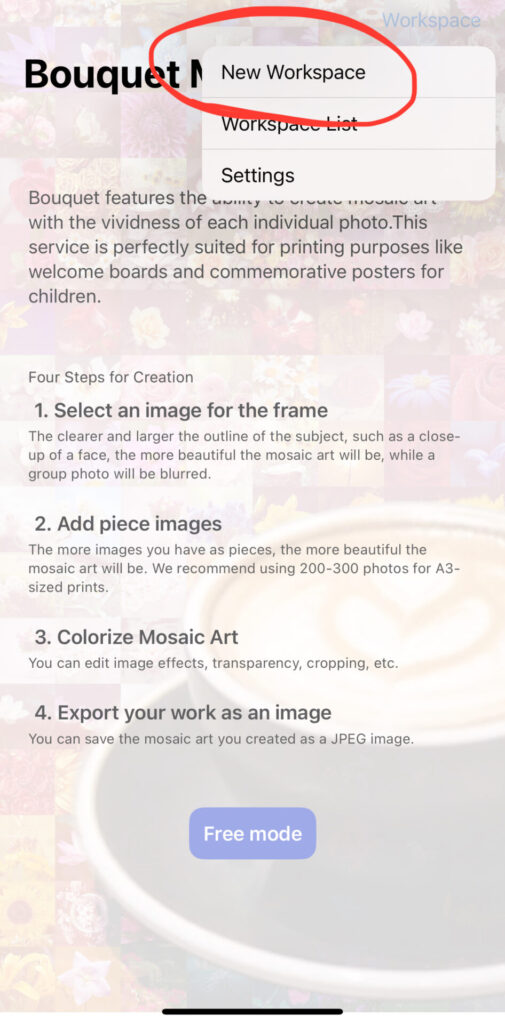
If you have previously created a mosaic and want to start an entirely new one, tap ‘Workspace’ in the upper-right corner, then ‘New Workspace’. See the screenshot (center) below for reference. Saved mosaics can be accessed by tapping ‘Workspace List’. This will take you to the below-right screen capture where you can access any of the three project memory slots.

Storing, Restoring, and Deleting Projects
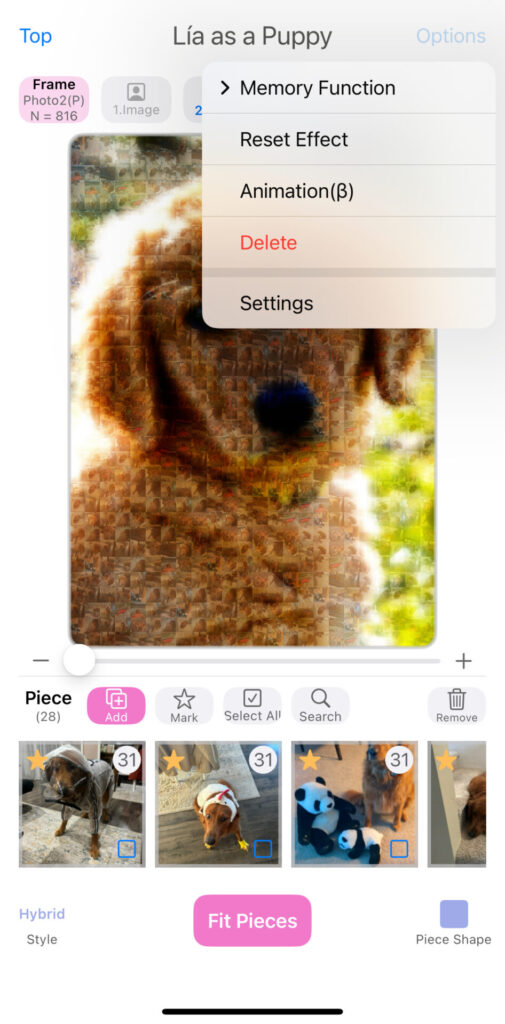
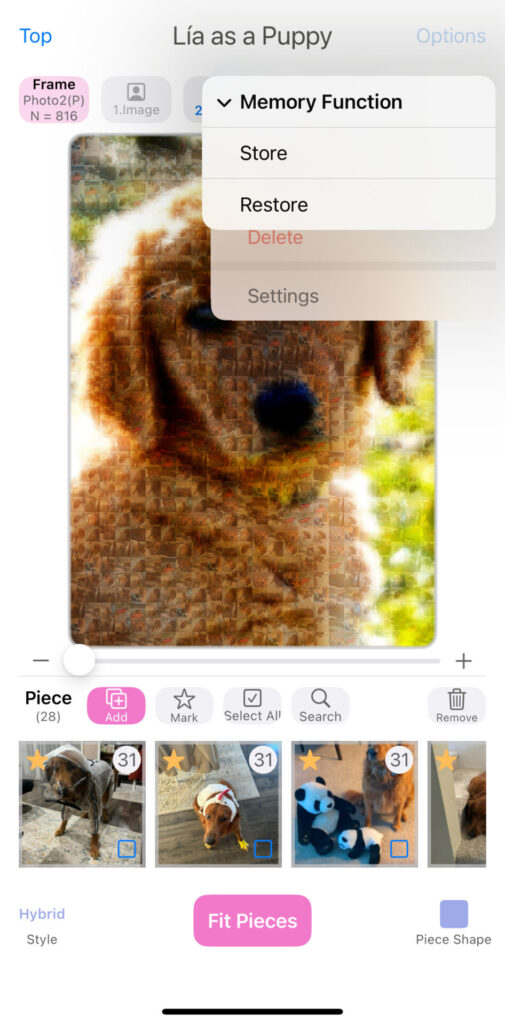
Storing and restoring saved projects is straightforward in Bouquet. If you already have a mosaic loaded, tap the ‘Options’ button in the upper right-hand corner of the screen. Here you’ll be presented with a prompt box with Memory Function, Reset Effect, Animation, Delete, and Settings. Tap ‘Memory Function’, then ‘Store’, and choose one of the three memory slots to save your current mosaic project. As you can see from the right-most screen capture, I’ve already chosen to save the project the guide article Lia as a Puppy.
IMPORTANT: If you select Delete from the Options menu, your current mosaic, even if it’s saved under one of the memory functions, will be permanently deleted.

Building a New Mosaic
For demonstration purposes, I cleared Bouquet’s memory to show the process start to finish of how to produce a mosaic. If there are no other pre-loaded projects, tapping ‘Free Mode’ will immediately prompt to select the desired size and then the parent image. The parent image, as mentioned before, is the primary image the software will recreate using the individual mosaic pieces (photos). From there, you’ll be prompted to make any adjustments to the photo like rotating or trimming (cropping).
Once back at the main screen, you’ll see ‘Add Pieces’ in pink, instead of ‘Fit Pieces’ only. Adding pieces will then allow the user to either select their photos manually, add from a photo album, Google Photos, or they’ll be clipped from a video.
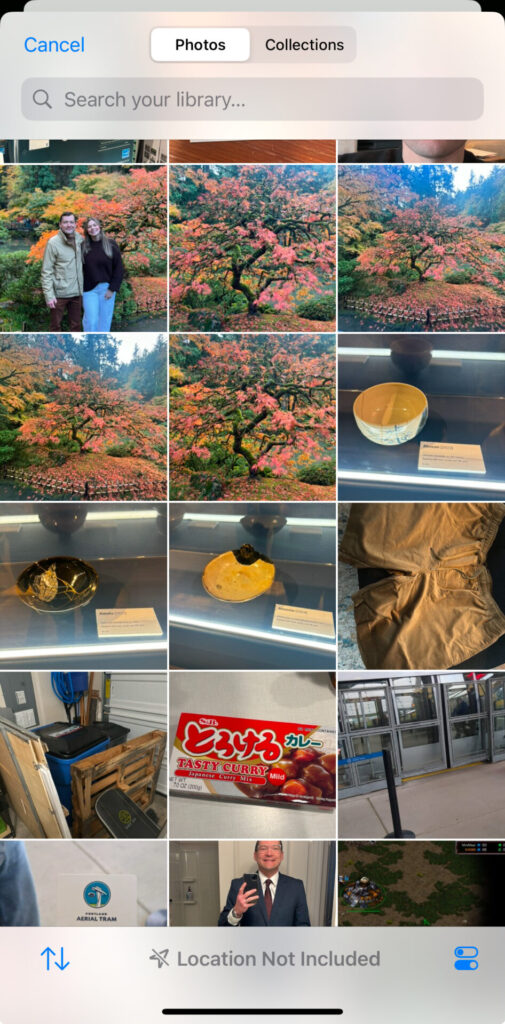
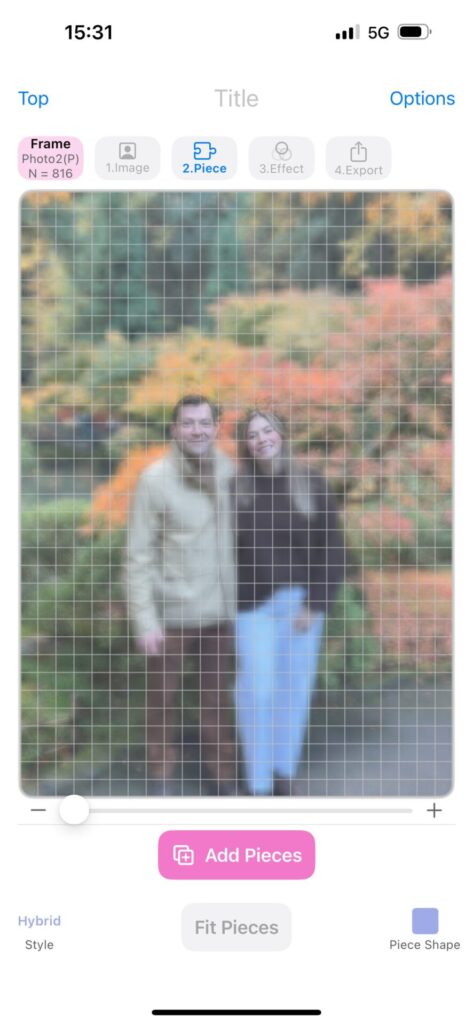
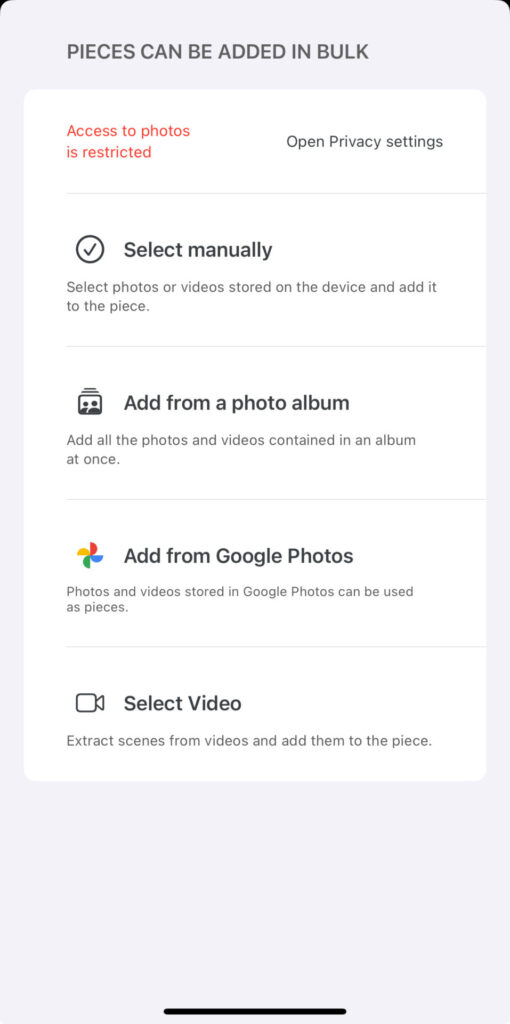
TIP: We recommend keeping the length of the selected video length to less than one minute long for optimal app performance. More on this can be found by reading our first article Introducing Bouquet.
Cutting and Filters
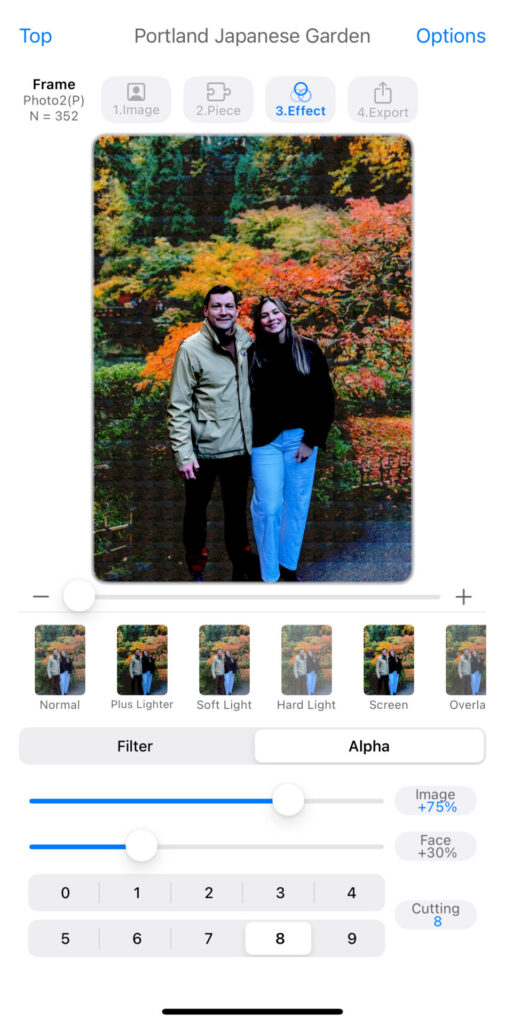
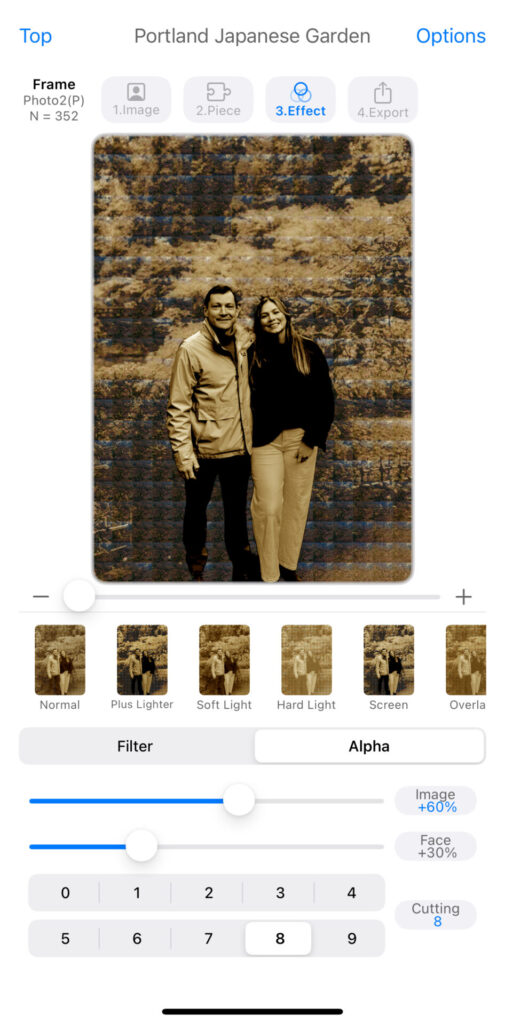
Two advanced customization settings we did not discuss in the previous article, Advanced Features of Bouquet, are Cutting and Filters. Cutting will use Bouquet’s built in object-detection to modify which areas of the parent photo are generated mosaic-style and which are left alone.
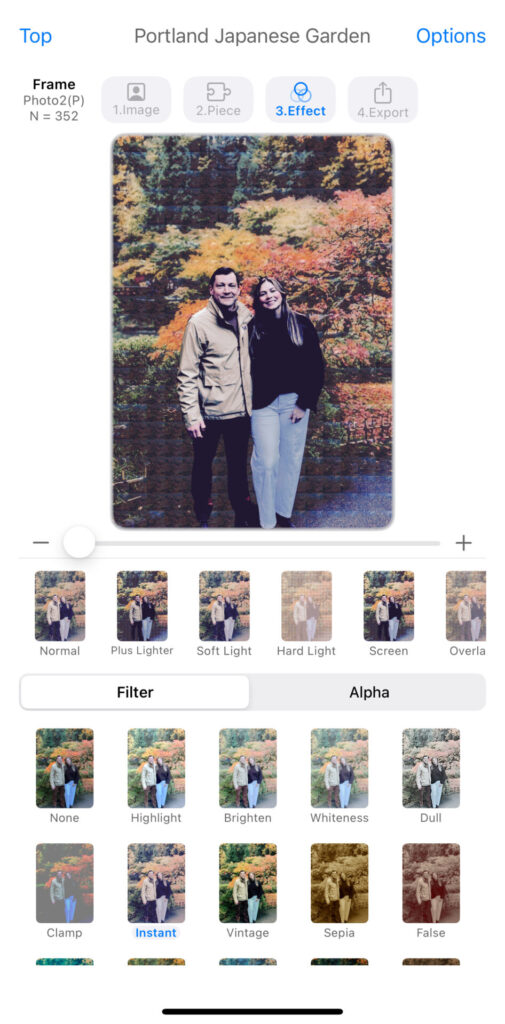
For the photos seen in the gallery below, I left the Cutting setting on ‘8’. This is so my wife and I, as the photo subjects, are left untouched, but the background still forms a mosaic. Then I changed the Alpha Image slider to ~70% and played around the with various filters. My final samples in the gallery below use the filter settings Normal (no filter), Instant, and Sepia.
Settings Screen
At any point, tapping Options then Settings will take you to the settings screen. From there you can purchase a ticket through the Purchase Export Ticket button to export your mosaics in the larger A2, A3, A4, B2, or B3 sizes. Export tickets are valid for 30 days and are perfect if you’re trying to change the décor in your home or apartment.
My wife has a wall in the living room dedicated to photos of us as a couple and family. She’s constantly changing to give the house a refreshed feel. Many pharmacy & drug store chains have reasonable photo printing costs, such as Walgreens or CVS. Inquire on their respective websites to learn more.
Next article we’ll talk about some exciting new ways on the horizon you interact with us. As always, we want to hear from you! Sola of America, Inc. is a boutique mobile app-design firm. As a smaller company, we’re able to interact with and respond more directly with users and want to know how we can improve. Please send any feedback to michael@sola.inc or leave a comment below.
We look forward to hearing from you!
Where to Download
The app is free to download. Use the links below. Try it today!
App Store:https://apps.apple.com/app/id1494245634
Official Website:https://bouquet.sola.inc/
Leave a Reply