Introduction
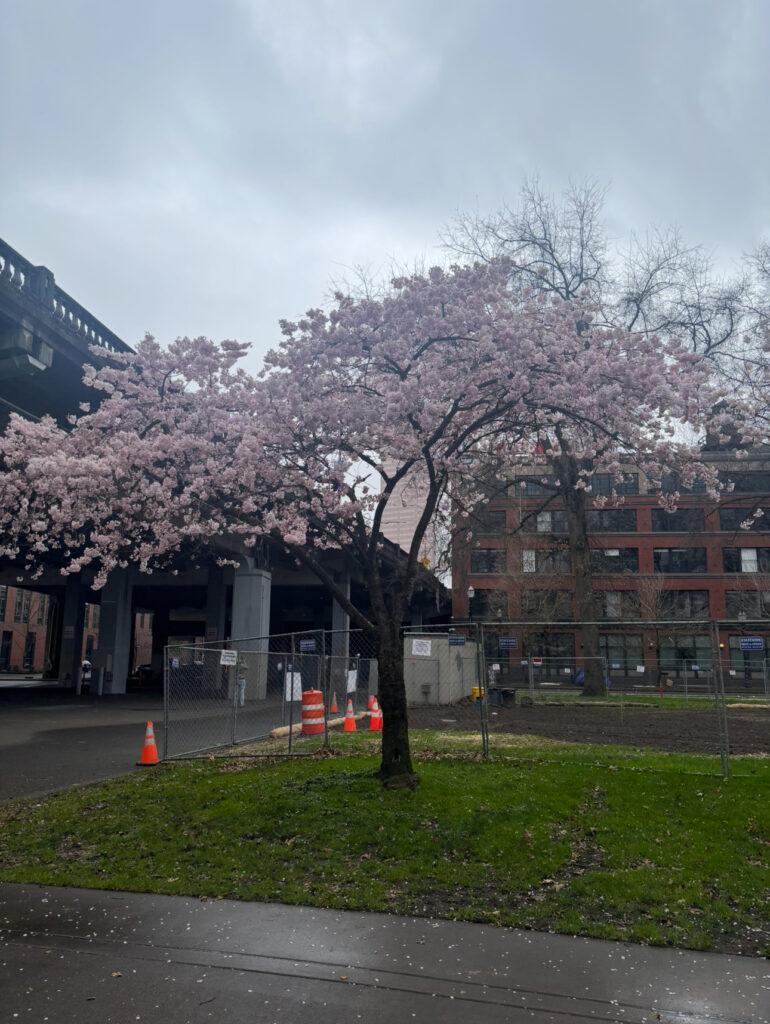
In our last article about Bouquet, we showed Portland, Oregon’s beautiful cherry blossoms at the Tom McCall Waterfront Park. As the reader, you don’t necessarily have to live in Portland specifically to enjoy the cherry blossoms blooming. I’ve seen them all over neighborhoods in Portland, Vancouver, up in Seattle, everywhere. The climate in the Pacific Northwest lends itself well to cherry blossoms. It also lends itself well to Japanese maples, which especially during their infancy, require very little direct sunlight compared to other trees. That is my understanding, anyway. I’ve never been much of a gardener or arborist personally, so you may want to confirm my ‘facts’ about the Japanese maple. I digress.
To clarify: for the remainder of this article, when it says child images, the meaning is not its literal translation of images of children. In the context of creating a photo mosaic, a child image is one of several images used as individual pieces to generate the final parent image, or mosaic.
H3 Previous Articles
Posted below are the articles related to Bouquet. The articles titled Bouquet: Photo Mosaic Tutorial and Advanced Features of Bouquet are written in more of a tutorial style format. Both articles take less than 5 minutes to read. If you’re new to Bouquet as a platform and want to learn more about its features and how to use it, I highly recommend checking those articles out.
Introducing Bouquet: Creating Stunning Photo Mosaics
Bouquet: Photo Mosaic Tutorial
Better Quality Mosaics with Bouquet
Where to Download
The app is free to download. Use the links below.
App Store: https://apps.apple.com/app/id1494245634
Official Website: https://bouquet.sola.inc/
No Photos Woes
When creating mosaics with Bouquet, one issue that feels like a constant struggle is the lack of piece (child) images to choose from. I am generally not one to take a lot of photos. After capturing a beautiful moment and wanting to turn it into a mosaic, I find myself lacking in child images to use. One remedy is to use short videos that Bouquet will automatically convert into child images for the parent mosaic. That’s a great remedy except, what happens when the video you took is in landscape but the parent image in square or portrait?
Recalling the Previous Mosaic
In the article from a couple of days ago Bouquet and Portland’s Cherry Blossoms, I used a couple of different sources for the child images. Several child photos I pulled from my own camera roll. Others were clipped from a short video I took while at the Tom McCall Waterfront Park. See below for the gallery of unedited photos.

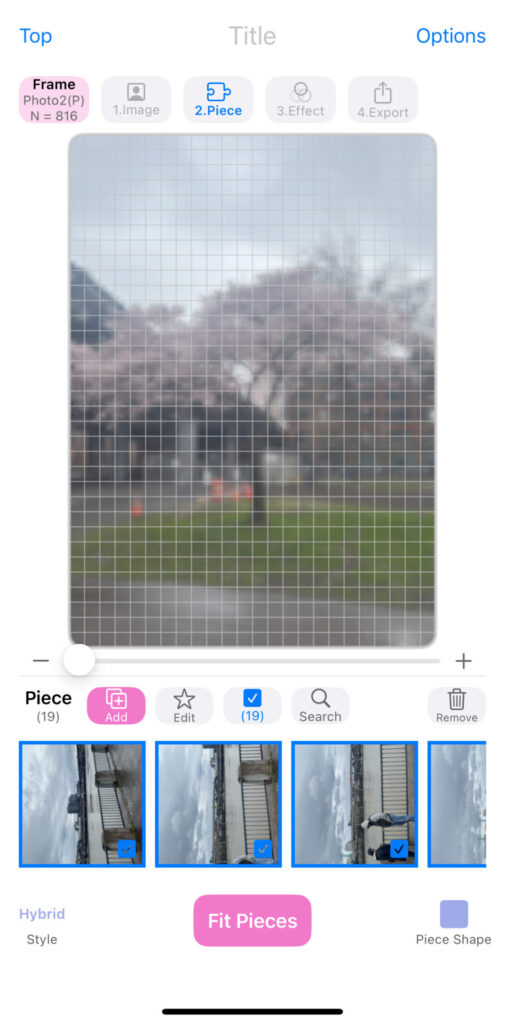
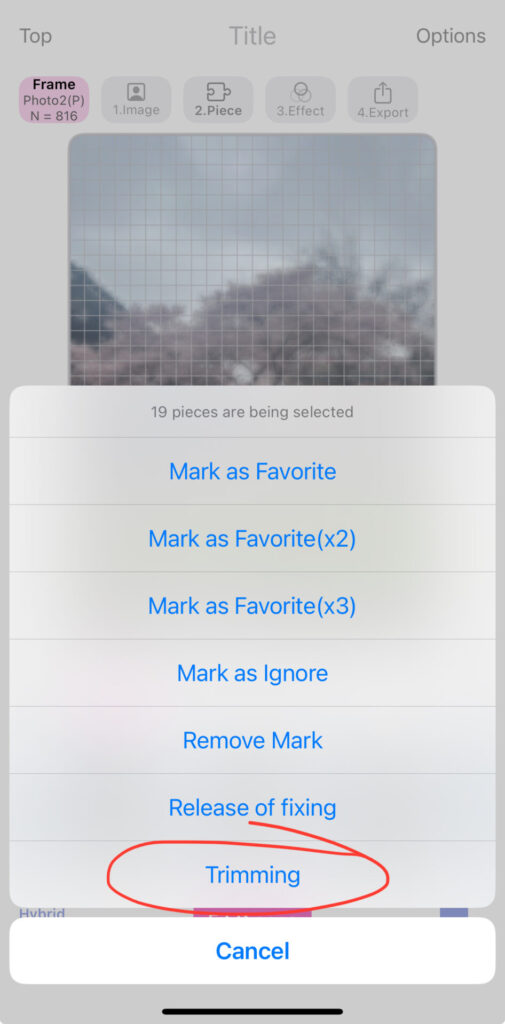
As I worked to get all the images added as pieces to the final mosaic, I noticed a problem. Images cropped from the video, since the video was taken in landscape format, were rotated 90 degrees to the left. All the photos clipped from the image were like this. Modifying them using the Trimming option felt like the easiest solution. See below.
Trimming Photos in Bouquet
Trimming photos in Bouquet is a simple enough process. Below there are three images in a gallery that go step-by-step on how to edit the piece images. If you pulled piece images from a landscape video clip like I did, your photos are likely rotated. Bouquet will automatically select any images pulled from a video-source.
By tapping Edit, marked by the star symbol, it will pull up several options. Many of these options were discussed in greater detail in previous articles such as Bouquet: Photo Mosaic Tutorial and Advanced Features of Bouquet. As mentioned in the introduction of this article, both of those articles take less than 5 minutes to read. I highly recommend checking them out if you’re unfamiliar with some of Bouquet’s more advanced features.
Tapping Trimming will then guide the user to a simple editing screen where the image can be rotated, cropped by dragging the corners, or reset. The Reset feature behaves exactly as expected and will return the image to its pre-edited state.

Once feature I particularly appreciate about Bouquet is that once the user taps OK, it will automatically proceed to the next-highlighted image for editing. That means every photo selected for editing can be quickly trimmed without reverting to the previous screen. It may not sound like a huge convenience now, but when editing 20 or 40+ images, having to return to the previous screen each time would be a pain.
Conclusion
The word that comes to mind when thinking about Bouquet’s editing features is convenience. The app developers really took great care when designing the overall layout, menus, and their features. The fact photos can be added manually, from a Google Photos account, or automatically clipped out from videos only adds to the convenience. The various color filters and image sliders to better highlight peoples’ faces, change the lighting, or make the child images more or less detailed are equally as convenient.
Bouquet is free to download and free when exporting smaller resolution mosaics. You never know what you might create.
Give it a try and be sure to tag us on Instagram @solaofamerica. We want to see all your unique creations. As always, leave a comment below or write the author directly at michael@sola.inc with any suggestions for future content or feedback. Thanks for reading!
H3 Where to Download
The app is free to download. Use the links below.
App Store: https://apps.apple.com/app/id1494245634
Official Website: https://bouquet.sola.inc/
Leave a Reply