Introduction
The Holiday Season is just around the corner! Thanksgiving, Christmas, also Hannukah, Kwanzaa, Rohatsu, New Year’s Eve and New Year’s Day, so many different reasons to gather with friends and family to relax, cook, eat, and of course, take photos and make lasting memories. In our first article from September of this year, we introduced readers to Bouquet, a simple to use software that can quickly and easily create stunning mosaics from your mobile device or Apple computer. The link to the original article can be found HERE.
In this article, we’ll be going through the simple steps required to produce an image like the one you see below. The picture is of the author’s golden retriever, Lia, when she was a puppy. Bouquet is the perfect companion for taking photos of pets, friends, family, vacations, or any time, then turning them into a unique and personalized photo mosaic to share.

Where to Download
The app is free to download, and can be found using the following links.
App Store: https://apps.apple.com/app/id1494245634
Official Website: https://bouquet.sola.inc/
Free Photo Export Sizes
The following photo mosaic sizes can be exported for free directly from the app in high definition.
Postcard: 3.9” × 5.8”
Photo2: 5” × 7”
Photo: 3.5” × 5”
Square: 8.3” × 8.3”
In the sample photo above, the author used size: Photo2 (L2) with image generator set to 816 photo uses. This means of the 28 selected photos to generate the mosaic, they were copied and arranged a total of 816 times to create the final image. The image count (N) can also be customized. Fewer pieces will result in a lower picture resolution but provide clearer detail in the individual photos used to create the mosaic. Higher image count (N) will produce a sharper final mosaic. Try it for yourself!
Creating your first Mosaic
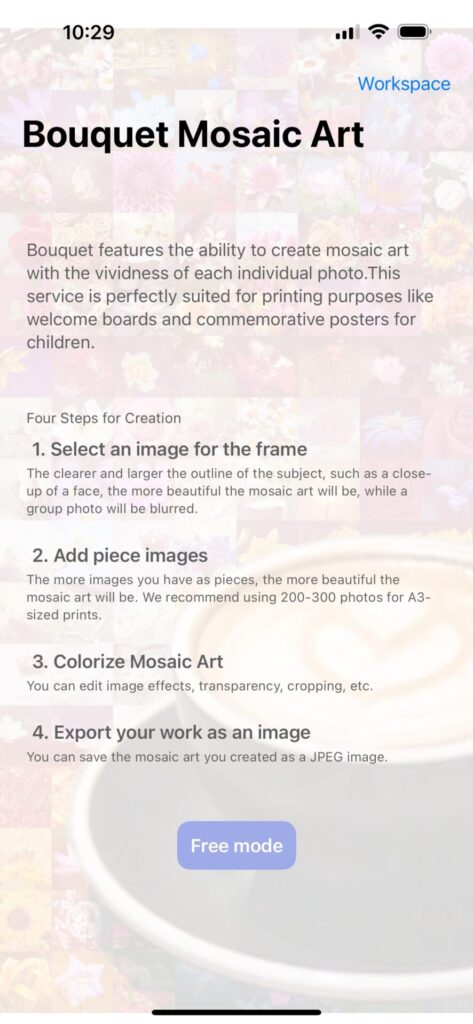
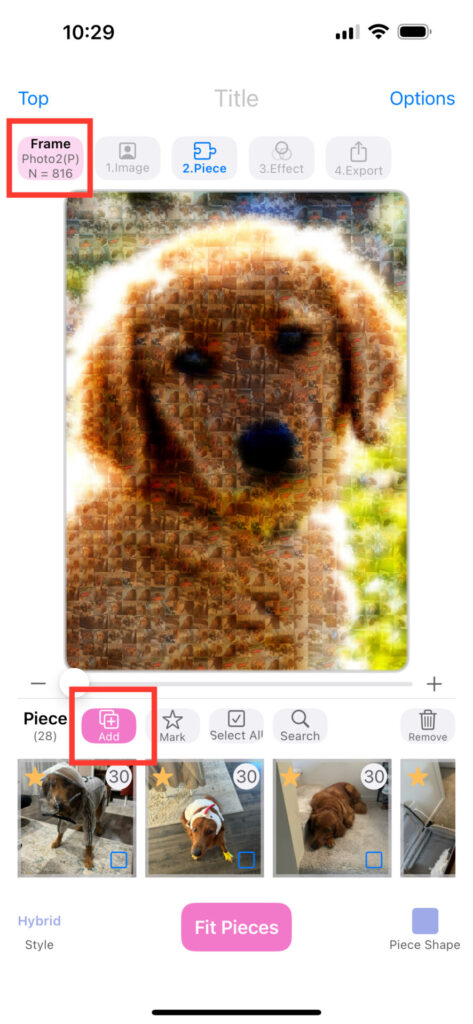
After first opening the application, you’ll be greeted with the screen seen below (left). Click the center button Free Mode to begin. Next, if you’re trying to match the image size in this article, tap or click Frame outlined with a red square in the screen capture below (right). My app is set to size: Photo2 (P), and N = 816. As explained briefly above, Photo2 means a 5” x 7” image. Keep in mind the app shows measurements in mm, which is more precise, but not the ‘Standard’ measurement system used in the United States. N is the number of tiles, or pieces, that will be used from the photos selected to create the mosaic.


Next to the Frame button (top-left of app screen), tap 1. Image to select the desired main mosaic image. This is the image that will be turned into a mosaic using the selected individual pieces (photos). After selecting the photos that will be used to create the mosaic, you can always tap a photo displayed in the row, then tap Mark with the star icon, and choose any individual preference from the menu for that specific photo. For example, you can instruct Bouquet to mark photos as a once, twice, or three times favorite (1x, 2x, or 3x), ensuring that photo is used more or less frequently. Note: the default setting for selected images is a 1x favorite. Photos can also be labeled Mark as Ignore to remove it from the mosaic.
Adding, Highlighting, and Deleting Mosaic Pieces
As shown above, once the desired photos (pieces) are selected, you can customize the mosaic as you see fit. The software will automatically detect the primary colors for photos and arrange them to make the mosaic look the cleanest. Tapping a photo will show its position(s) in the mosaic with blue boxes. It can then be removed or replaced with other photos to the user’s preference.
With the selected photo, tapping Mark, and then Mark as Ignore will only cause the software to stop including that single photo in the final mosaic after tapping Fit Pieces—the largest button in the app’s interface. Selecting and then tapping Remove with the trashcan icon will remove the piece from the mosaic entirely and cannot be used again without tapping the Add button and re-incorporating the image into the pieces gallery.
Adding Pieces
Methods for Adding
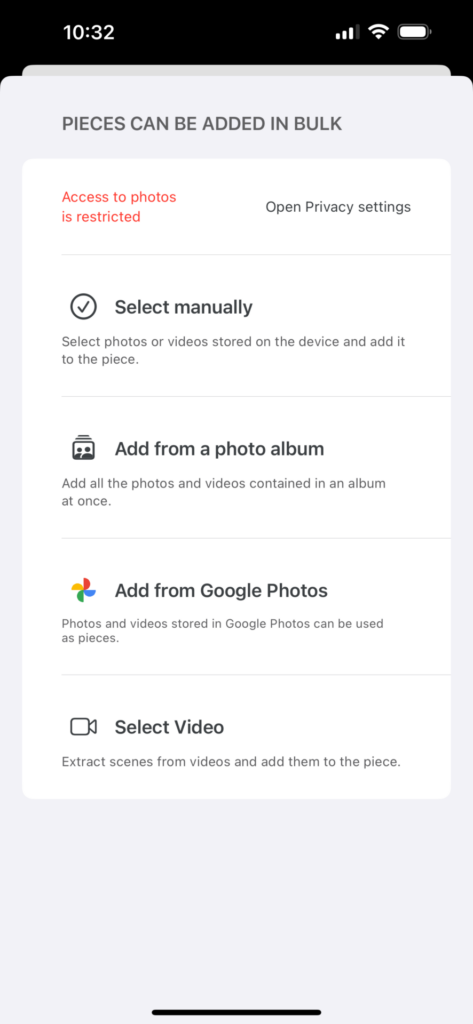
Pieces can be added using four distinct methods.
- Manually
- Add from a photo album
- Add from Google Photos
- Select Video

When creating the sample mosaic of my wife and I’s golden retriever from when she was a puppy, I selected all the photos used manually. Look below at the photo strip and notice how poor of a photographer I am (my wife is much more talented at taking pictures than me). Even though the individual photos of my dog are amateur, at best, the final mosaic still came out stunning. Don’t let our dog’s face fool you. She gets walked every day, eats expensive dog food, and regularly sees the vet to remain healthy. She just likes to act sad.


Holiday Photo Ideas
A trick for this upcoming Holiday Season will be to save photos to specific folders. Using this method, you can create multiple mosaics of individual friends or family members by selecting different ‘main images’, but use the same folder of multiple photos to construct each unique image. For example, you can take 15 or 20 photos of Thanksgiving dinner, then individual portrait-style photos of your family to create individual mosaics for each person.
Alternatively, if you are a photo enthusiast, try creating individual folders of each family member and then creating a mosaic from photos of just that one person. Remember, if using the one of the free sizes: Postcard, Photo, Photo2, or Square, the images can be exported in high resolution.
Try it for free! Be sure and tag us with #PhotoMosaic or #BouquetApp when sharing on social media. We would love to see your unique and creative works!
Be sure to leave a comment below with any questions or additional feedback.
Download Links
App Store: https://apps.apple.com/app/id1494245634
Official Website: https://bouquet.sola.inc/
Leave a Reply